|
|   |
|
| |
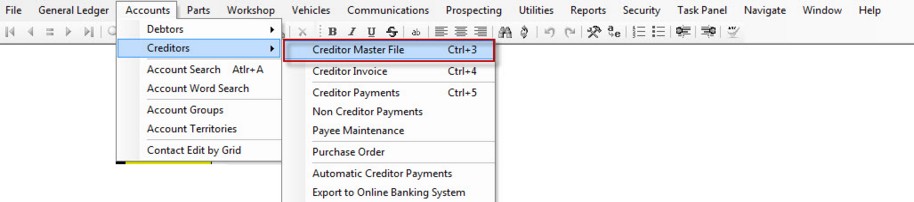
Creditor Master File stores information about each creditor (supplier). You can store all the essential information about your suppliers within this area of the software. As it is one of the most used functions of the software, it has been hot-keyed to Ctrl + 3 for convenience.
Header Area and Entering a Creditor
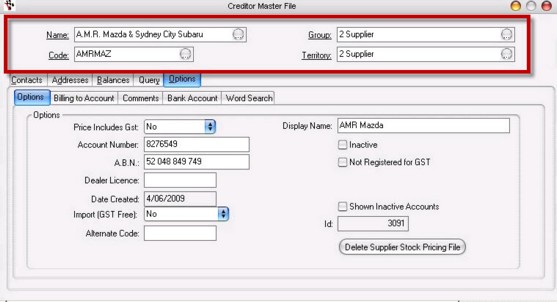
Name - The header information of the Creditor Master File screen contains the Supplier Name, which can be the name of a business or individual from which you order and purchase goods and services. Autosoft recommends that you keep the format of the names consistent throughout your creditor list, such as surname followed by first-name (ie Smith John instead of John Smith). Similarly for businesses, utilise a means of being able to search more easily for businesses and keep a consistent format (eg Spare Parts Shop The rather than The Spare Parts Shop, or Repco Brookvale branch rather than Brookvale Repco).
Code - A unique code that identifies the Debtor. The Creditor code will show once a name is chosen. Searches for Creditors can also be made by Creditor code. Unlike the Debtor Master File this code must be manually entered, and can be alpha-numeric. A tip for organizing Debtors and Creditors is to have Debtors use the Get Next Code option to assign a numeric code for all Debtors, and to use alphabetical coding for creditors. This is most useful when you have businesses you both buy off and sell to (hence businesses that are both creditors and debtors), and will allow for easy identification of a debtor transaction or a creditor transaction.
Group - Groups are setup in Account Groups in the Account menu. When groups are setup you can send bulk emails or mail merge letters to a group in the Account Groups program. Numerous reports can be printed by group.
Territory - Territories are setup in Account Territories in the Account menu. When territories are setup you can send bulk emails or mail merge letters to territories in the Account Territories program. Numerous reports can be printed by territory.
Contacts Tab
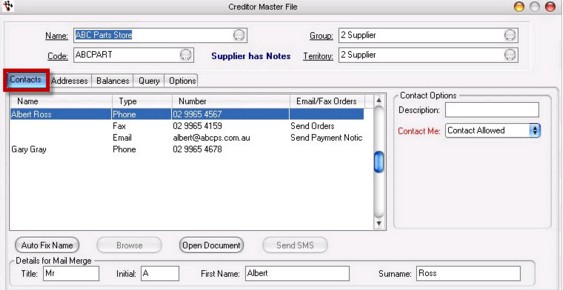
Name - Enter the contact name.
Type - Press ALT + down arrow or click on Type field, choose the type Phone number, Fax number, Mobile, Email Address or Web Address.
Number - Enter the phone, fax, mobile numbers, email and web addresses as per the numbers and descriptions above.
Email/Fax - You have the option to send orders and remittances automatically by fax or email. There are three options to choose from: Send Orders, Send Payments Notices or Send Both (Orders and Payment Notices). These email addresses will automatically appear in the options for re-printing/previewing invoices as well by becoming available on the default email-addresses that can be chosen as recipients.
Contact Options
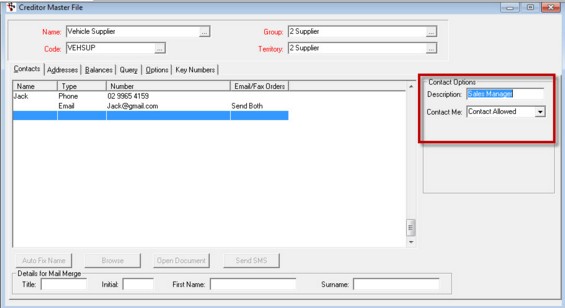
Description - Enter the contact description i.e. Sales Manager, Owner etc (in contact options).
Contact Me - Select Contact Allowed or Do not Contact me. This does not stop communications via the Communication Centre. To stop any communication from the Communications Centre you need to tick the do not contact me in the Options tab.
Buttons
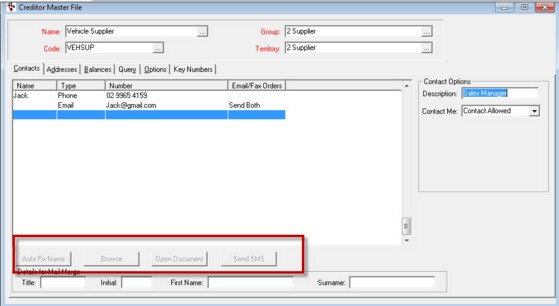
Autofix Name- Click on Auto Fix Name while the cursor is on the new name to automatically update the name fields for the mail merge.
Browse - If the cursor is on a Web Address under contact types the Browse box will become highlighted. If the Browse box is clicked (and the Internet is connected) it will search the Internet for the web address.
Open Document - If you have Microsoft Word on your system you are able to open a document and using MS Word to mail merge the contact information to the document. See Client Letters and the Communications Centre for more information on communications.
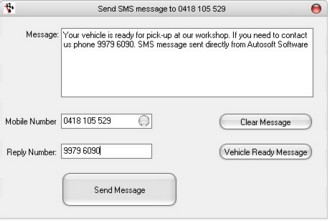
Send SMS - If the cursor is on a Mobile contact type the Send SMS box will become highlighted. Type in message, or select a pre-configurable message by clicking Vehicle Ready Message. (This message is able to be modified in the Messages setup area of the software). Click Send Message. See Send SMS for more details.
Details for Mail Merge - the system utilises these details when mail merging for contact with clients. These can be updated from the contacts box using the Auto Fix Name button or can be typed in manually.
Addresses Tab
Enter address details for Street, Postal and Delivery addresses
Addresses . When the cursor is in Suburb type part of the suburb name and press the F4 search key. A range of suburbs will be shown, choose the suburb required and press OK. Suburb, State and Post Code will transfer to the address. Most post codes in Australia are in the database. To add or edit post codes see Post Codes in the Utilities menu.

Street Address - Type the debtor's street address
Suburb - type part of the suburb name and press the F4 search key. A range of suburbs will be shown, choose the suburb required and press OK. Suburb, State and Post Code will transfer to the address. Most post codes in Australia are in the database. To add or edit post codes see Post Codes in the Utilities menu.
State - You can either type the State or automatically enter it when you enter the client's suburb address
Postcode - You can either type the Postcode or automatically enter it when you enter the client's suburb address
Delivery Address - Enter the client's preferred delivery address
Postal Address - Enter client's Postal address if there is any
Dymo Label Options
If you have a Dymo Label printer you are able to print address and shipping labels. For more information and setup, contact us.
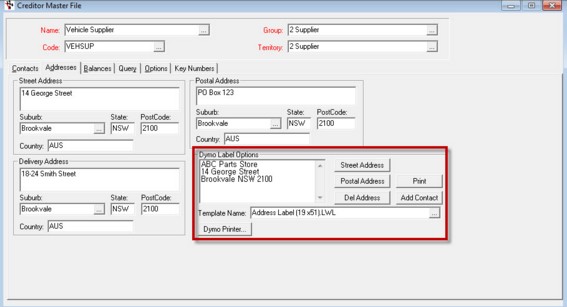
Street Address - Adds the name and street address details to the label.
Postal Address - Adds the name and postal address details to the label.
Del Address - Adds the name and delivery address details to the label.
Open Label - Opens the Dymo Label Software, allowing you to modify the label.
Print - Print label on Dymo printer.
Add Contact - Adds the name highlighted in Contacts tab to the label.
Template Name - Click and select template to use for label print.
Dymo Printer - allows you to select DYMO Printer with Roll and Refresh List
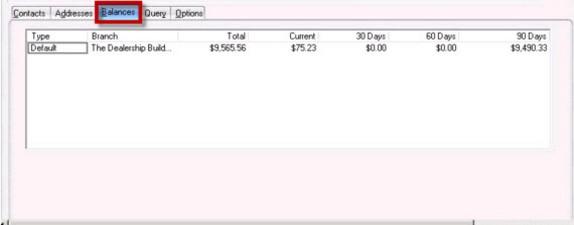
Balances Tab
Displays the creditors total, current, 30, 60, 90 days outstanding balances for a particular creditor. The 30/60/90 relates to the post-date of the transaction.
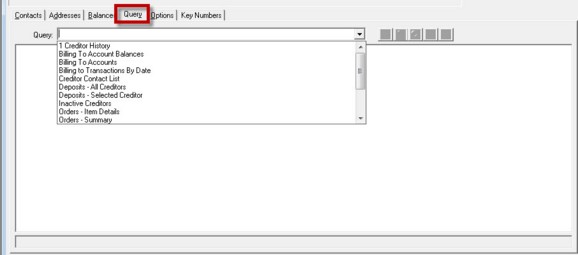
Queries Tab
Are mini reports. See Queries & Selection Lists for more information.
There are a range of queries in the Query tab. Some examples are;
Options Tab
Options Sub-Tab
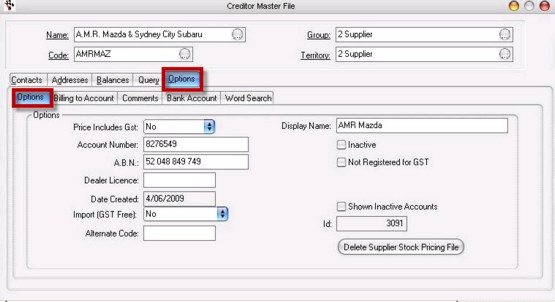
Price Includes GST - If Yes is selected GST is reduced on each line item and added to the value in GST box at the bottom of the creditor invoice. If No is selected the GST value is calculated on the line item price and added to the value in the GST box at the bottom of the creditor invoice.
Setting this option to Yes or No depends on your Supplier's invoice and whether or not the line items on the invoice contains GST or not.
Account Number - This is the Creditors account number for your reference.
A.B.N. - Enter the Creditors ABN for your reference.
Dealer Licence - This is for the Autosoft5 Dealership module only. Enter the Dealership License.
Date Created - The date this Creditor was first created.
Import (GST Free) - Set the creditors invoice GST free by selecting Yes, or No to include GST.
Alternate Code - An alternate supplier code or Capricorn customer code.
Display Name - An alternate name for the selection lists. Only used for searching purposes.
Inactive - Tick this box for Creditors that you no longer want active but you wish to keep in the Creditor Master file.
Not Registered for GST - If this box is ticked GST will be calculated accordingly.
Is a Company (not Individual) - tick if creditor is a company
Show Inactive Accounts - Tick if you want inactive accounts to be shown
ID - Internal system identification number for the Creditor.
Billing to Account Sub-Tab
Is used when you do not want to send the bill to this account but to another account ie. Capricorn Society.
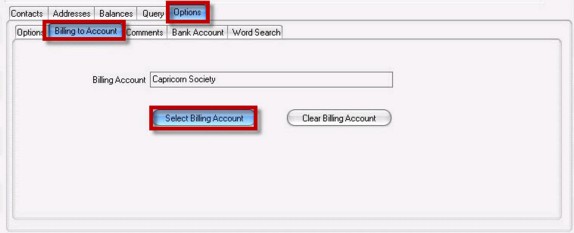
Select Billing Account - Brings up the list of Creditors to choose the account to bill to.
Clear Billing Account - Removes the Billing to Account for that creditor.
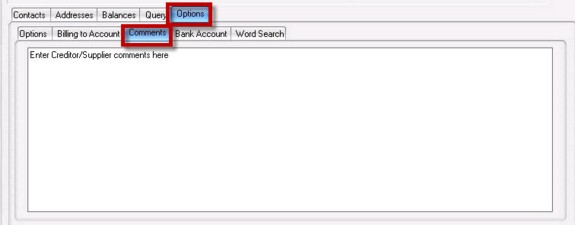
Comments Sub-Tab
Comments can be added for this creditor and can be viewed in the Creditor Invoice, under the Notes tab. When comments are entered into this field Supplier Notes will show when this creditor is opened in the Creditor Master File and when the creditor is chosen in a Creditor Invoice.
Bank Account Sub-Tab
Bank details can be added here for banking purposes.
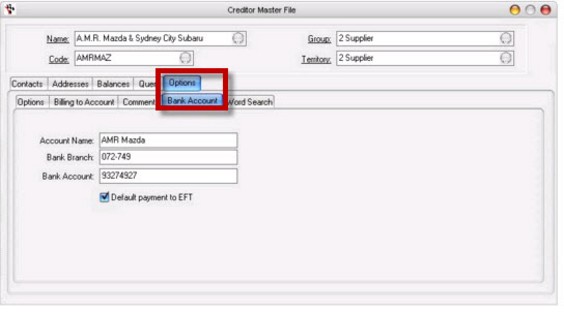
Account Name - Creditor's account name
Bank Branch - Name of Creditor's bank branch number code
Bank Account - Bank Account number
Default payments to EFT - When a Creditor Payment is processed as an EFT payment to the online banking system it uses these bank details only if Default Payment to EFT is ticked and the direct entry online banking details are setup in the specific Autosoft bank account.
Word Search Sub-Tab
The words that are added can be for any reason, you may want to add the word Genuine then when you search you can find all the debtors who buy only genuine parts. It's up to your imagination of how you will use this feature. This is also available as a useful option in the Debtor Master File.
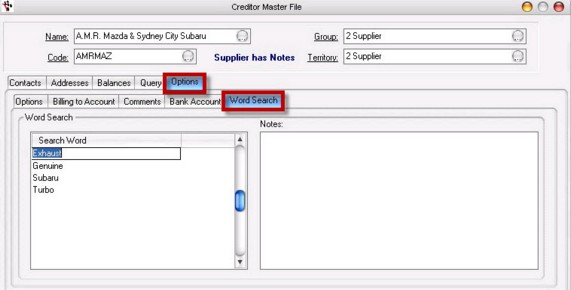
Search Word - Word to be searched
Notes - Meaning of the word as used by your company
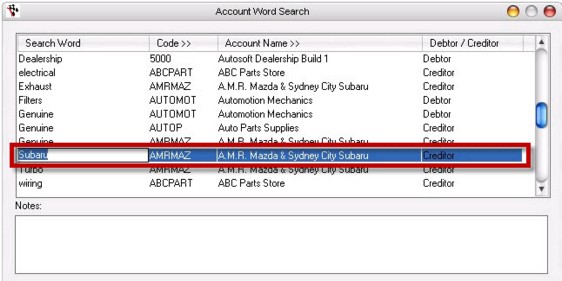
Searching for Creditors using Account Word Search
Word search can be carried out through Account Word Search in the account menu.
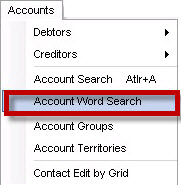
If you add words into the Word Search box in the Creditor Master File you can search for the occurrences of the word in the account word search program.
|
What are you trying to do? |
Video/Knowledge base Guide |
|
Create a Creditor |
http://service.autosoft.com.au/entries/21697185-How-to-Create-a-New-Creditor-Supplier |
|
Create an International Creditor |
|
|
Delete or make a Creditor Inactive |
http://service.autosoft.com.au/entries/21806530-How-to-delete-or-make-a-Creditor-Supplier-Inactive |
|
Watch Videos to Learn More about Creditor Accounts, Setup and Maintenance |
Go to your Client Portal Login - Training Lessons - Accounting Series |