|
|   |
|
| |

Debtor Master File stores information about each debtor (customer). You can store all the essential information about your client base within this area of the software. As it is one of the most used functions of the software, it has been hot-keyed to Ctrl + 1 for convenience.
Here is the list of Header areas in the order of how you would enter a new Debtor or view an existing Debtor.
Header Areas
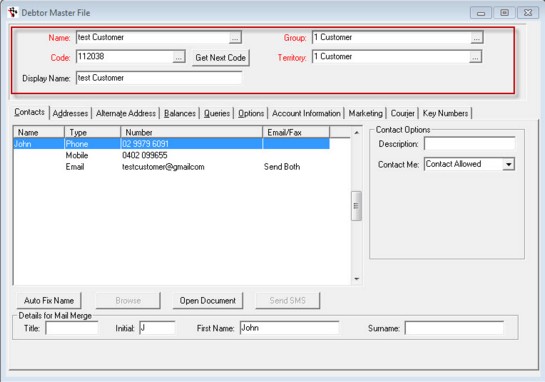
Name - this can be the name of a business or individual. If entering a customers name, we recommend you enter it with SURNAME FIRSTNAME. This field is searchable so if entered this way, you can easily search for the customer by their surname. It is also good to keep the format of the names consistent throughout your debtor list, such as customer surname followed by first-name (ie Smith John instead of John Smith). Similarly for businesses, utilise a means of being able to search more easily for businesses and keep a consistent format (eg "Spare Parts Shop The" rather than "The Spare Parts Shop").
Code - this is a unique code that identifies the Debtor. The Debtor code will show once a name is chosen. Searches for debtors can also be made by debtor code. The code can be automatically generated by using the Get Next Code in. This will assign the account a unique number. Subsequent accounts will assign the next number after the previous account (ie first Account has Code 1000, second Account 1001 etc). The code can be manually entered, or changed after the account has been created.
Display Name - This is the Name that will appear on Invoices and Statements. Therefore you would enter the full business name OR the customers TITLE FIRSTNAME SURNAME. For example. Mr John Smith
Group - Groups are setup in Account Groups in the Account menu. When groups are setup you can send bulk emails or mail merge letters to a group in the Account Groups program. Numerous reports can be printed by group.
Territory - Territories are setup in Account Territories in the Account menu. When territories are setup you can send bulk emails or mail merge letters to territories in the Account Territories program. Numerous reports can be printed by territory.
Contacts Tab

Name - Enter the contact name.
Type - Press ALT + down arrow or click on Type field, choose the type as below:
Number - Enter info as per the numbers and descriptions above.
Email/Fax - You have the option to send invoices and statements automatically by fax or email. These email addresses will automatically appear in the options for re-printing/previewing invoices as well by becoming available on the default email-addresses that can be chosen as recipients. Among the three options to choose from are as follows:
NOTE: the faxing option is only available if you have setup a faxing account with SMS Global or your fax software provider. See Setup Faxing Service.
Contact Options
Buttons
![]() - Click on Auto Fix Name while the cursor is on the new name to automatically update the name fields for the mail merge.
- Click on Auto Fix Name while the cursor is on the new name to automatically update the name fields for the mail merge.
![]() - If the cursor is on a Web Address under contact types the Browse box will become highlighted. If the Browse box is clicked (and the Internet is connected) it will search the Internet for the web address.
- If the cursor is on a Web Address under contact types the Browse box will become highlighted. If the Browse box is clicked (and the Internet is connected) it will search the Internet for the web address.
![]() - If you have Microsoft Word on your system you are able to open a document and using MS Word to mail merge the contact information to the document. See Client Letters and the Communications Centre for more information on communications.
- If you have Microsoft Word on your system you are able to open a document and using MS Word to mail merge the contact information to the document. See Client Letters and the Communications Centre for more information on communications.
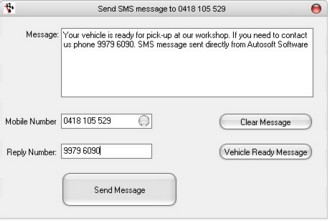
![]() - If the cursor is on a Mobile contact type the Send SMS box will become highlighted. Type in message, or select a pre-configurable message by clicking
- If the cursor is on a Mobile contact type the Send SMS box will become highlighted. Type in message, or select a pre-configurable message by clicking ![]() (This message is able to be modified in the Messages setup area of the software). Click Send Message. See Send SMS for more details.
(This message is able to be modified in the Messages setup area of the software). Click Send Message. See Send SMS for more details.
Details for Mail Merge - the system utilises these details when mail merging for contact with clients. These can be updated from the contacts box using the ![]() button or can be typed in manually.
button or can be typed in manually.
Addresses Tab
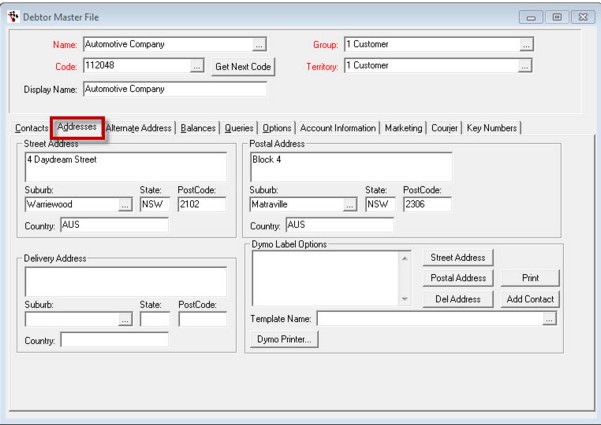
Addresses
Dymo Label Options - If you have a Dymo Label printer you are able to print address and shipping labels.
NOTE: You need to check the box in the System File to be able to use the Dymo label printer and software. There are various areas in Autosoft that use Dymo label print options.
Alternate Address Tab - Type all addresses you are likely to send goods too. In the Parts Invoice, these addresses can be chosen for delivery.

Name - contact person's name
Address - street address of contact person
Address 2 - additional address aside from street address
Suburb - name of suburb
State - name of state
Postcode - postcode number
Country -name of country
Balances Tab - Displays the debtors total, current, 30, 60, 90 days outstanding balances for Service & Parts and Vehicles.
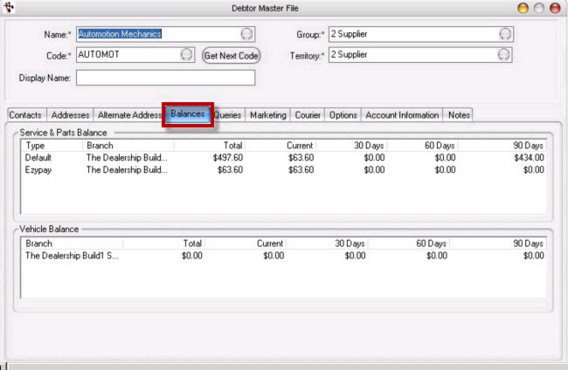
Service & Parts Balance - TBA
Vehicle Balance - TBA
Queries Tab
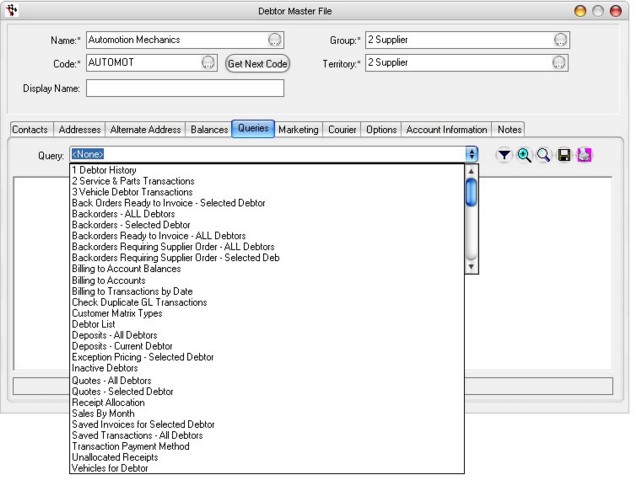
Queries - are mini reports. See Queries & Selection Lists for more information. There are multiple queries available and this list may be added to. Some of the current queries are;
Marketing Tab
Contains information on specific marketing information that is associated with a client, as well as providing a way of managing a loyalty program within Autosoft that can manage a rewards scheme for your clients.
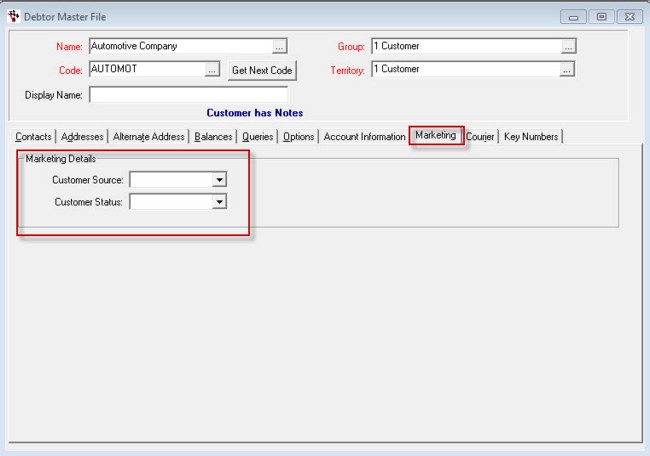
Marketing Details

Loyalty Program- If there are Loyalty Campaign options that have been setup in the system then you will be able to select them here and assign a Debtor account to a specific Loyalty Campaign
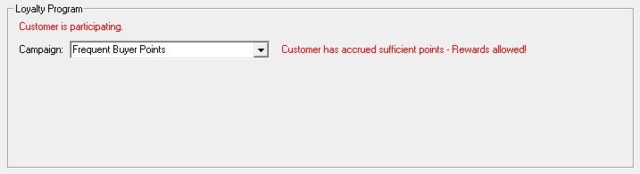
NOTE: Debtors can only be a part of 1 Loyalty Campaign at a time.
For more information on Campaign setups and management see the Loyalty Campaigns topic
Options Tab
Options Sub-Tab - allows for comprehensive customisation options to tailor the debtor to certain functions
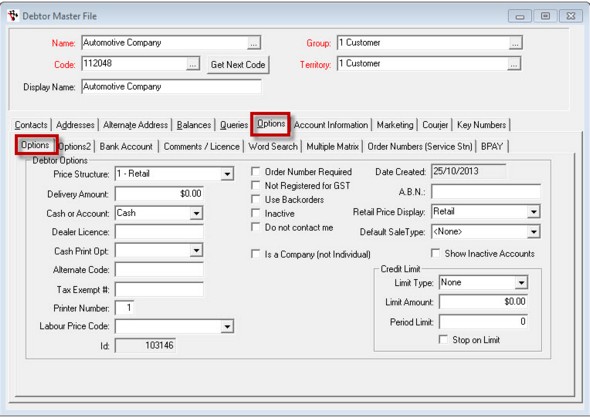
Price Structure - Select the pricing matrix for the debtor. The discounts or markups given in a price matrix are setup in the Pricing Matrix.
Delivery Amount - If a default delivery amount is entered here it will show in the invoice. Alterations can be made to the amount in the invoice.
Cash or Account - If this is a charge account debtor choose Account. For a cash debtor choose Cash. When the client is Cash, payments are made when invoices are processed i.e. there are no outstanding amounts shown in balances for a cash sale debtor. Cash invoices optionally print to a docket printer, selected in Cash Print Opt:
Dealer Licence - Enter the dealer licence number if you have Dealership software. This prints on Form 2 (Police Book).
Cash Print Opt - This is used when printing specific cash invoices to different printers.
-cash docket
- full invoice
- use system settings.
Alternate Code - An alternate customer code or capricorn customer code.
Tax Exempt # - Enter a customers tax exempt number if no GST is to be charged on an invoice. GST can be charged to the customer if the exemption number is deleted from the Tax Number field in the invoice at time of invoicing.
Printer Number - Will print this many copies of transaction invoices
Labour Price Codes - TBA
ID - Internal system identification number for the Debtor. Cannot be changed by users, and only used as an internal database reference (will never appear on invoices or reports)
Order Number Required - When ticked you cannot go past the order number field in a Parts invoice without entering the order number. Used for customers who require an order number. Many government departments, hospital, police etc will require order numbers.
Not Registered for GST - Tick this box if the debtor is not registered for GST. Mainly used for Autosoft Car Sales and Dealership software.
Use Backorders - Tick this box if this customer is allowed to have backorders in the system. NOTE: Use Backorders must be ticked in the System File, Parts Tab for backorders to be enabled in the system.
Inactive - Tick this box for accounts that you no longer want active but you wish to keep in the Debtor Master file. Inactive Accounts will no longer appear in account searches when doing invoices, and will only be able to be viewed if the Show Inactive Accounts option is ticked.
Do not contact me - Tick this box if you do not want the debtor to appear in the Communication Centre. This debtor will be removed from the communications list and will not be available to receive any communication in the Communications Centre.
Is A Company (not Individual) - TBA
Date Created - When the debtor was added to the Debtor Masterfile
A.B.N - Enter the debtor's Business Number if applicable.
Retail Price Display - Prices in RRP can be Retail, List or None (no display).
Default Sale Type - When processing workshop invoices, the system will default to the selected sale type.
Show Inactive Accounts - Debtor accounts that are ticked Inactive in the Options tab can be viewed if this box is ticked.
Credit Limit - Credit limits can be setup by Amount, Both, None and Period.
Amount - is used, (period is zero) when the amount is reached the process is the same as above.Note: If the Stop on Limit box is ticked you will not be able to process an invoice if any of the above credit limits are exceeded. When invoicing to a Debtor the Credit Limit is checked line by line.
Period -is used (amount is zero) when the Period is reached the process is the same as above
Both - if this is selected, enter a dollar value and the Period Limit number; 1=30 days, 2=60 days, 3=90days+ i.e. Amount is $1000 with a Period Limit of 2. Regardless of the period being reached, when the Amount is reached it will warn "Credit limit exceed continue Yes/No". If any amount is over 60 days it will warn "Credit limit
exceed continue Yes/No". If Yes is answered, the invoice can be processed only if Stop on Limit is not ticked. The period limit can also be in days. eg 45 = 45 days.
None - if this is selected, no credit limits are in force.
Options 2 Sub-Tab
.
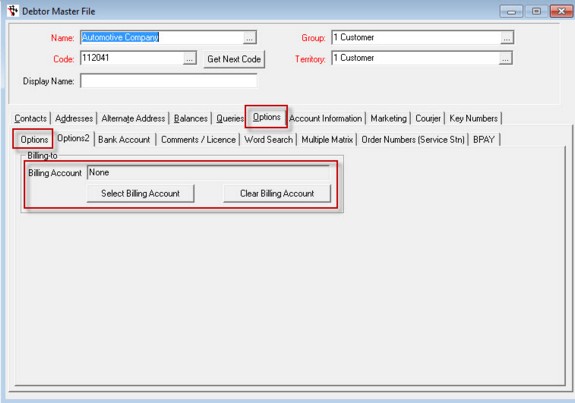
Billing to Account - is used when you do not want to send the bill to this account but to another account ie. Capricorn Society.
Bank Account Sub-Tab

Bank Details for Receipts- can be added here for banking purposes. When a debtor receipt is processed it automatically transfers the cheque details to these fields. These details are also printed on the Bank Deposit slip.
Comments / License Sub-Tab

Comments - can be added for this debtor and can be viewed in the Parts or Workshop Invoice, under the Customer Notes tab. When comments are entered into this field Customer Notes will show when this debtor is opened in the Debtor Master File and when the debtor is chosen in a Parts Invoice.
License Details - can also be stored into the system.
Multiple Matrix Sub-Tab
To give the debtor their own individual matrix click on the Add Matrix box in this tab, choose a matrix that is close to the one you require then change the percentages to suit this debtor. If a debtor has more than one matrix a selection box will show when creating an invoice for that debtor. Debtors own Matrix(es) will show in the Price Matrix program under the debtors name. NOTE: Use Selected Matrix check box needs to be ticked in the System File under the Parts tab, to be able to use Multiple Matrix option.

Desc - TBA
Type - TBA
Ordering - TBA
Price Structure - TBA
Percentage- TBA
Word Search Sub-Tab - can be carried out through Account Word Search in the account menu.
If you add words into the Word Search box in the Debtor Master File you can search for the occurrences of the word in the account word search program.
The words that are added can be for any reason, you may want to add the word Genuine then when you search you can find all the debtors who buy only genuine parts. It's up to your imagination of how you will use this feature. This is also available as a useful option in the Creditor Master file.
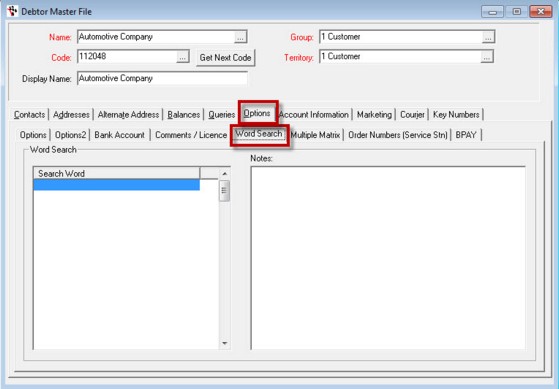
Search Word - word to be searched
Notes - your own definition of the word as used by your company
Order Numbers (Service Stn) Sub-Tab
This module is usually used by service stations running the Fuel module. Type in the order number for the debtor in the order number column.

Order Number - In a service station invoice, it enables you to choose an order number for that debtor. This order number also prints on the invoice and on statements. This has a degree of utility when a single account has multiple vehicles that need to use it, as the example shows - the number-plates of the vehicles can be used to identify them on the Invoices.
B-Pay Sub-Tab - allows details to be pre-entered for B-Pay accounts.
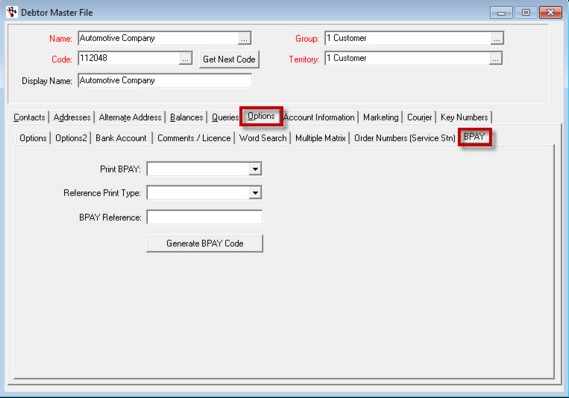
Print BPAY - allows a choice between Statement, Invoice or both
Reference Print Type - has an option of Use Invoice number as BPay Reference, or Use Account BPay code.
BPAY Reference - codes that will be utilised. By clicking the ![]() button, the code will automatically be generated as per BPay referencing criteria.
button, the code will automatically be generated as per BPay referencing criteria.
Account Information Tab - options in the Code Type Setup. It allows an area for miscellaneous information to be added to a debtor account that has some generic foundation in terms of debtor accounts.
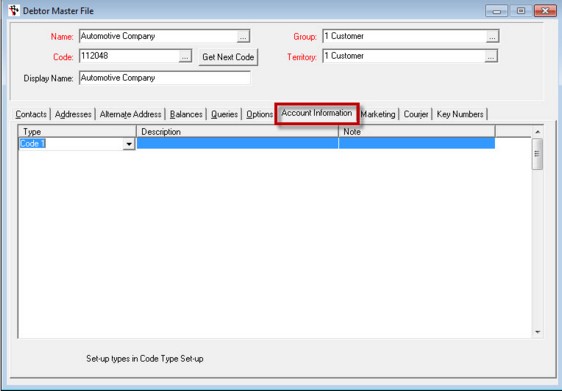
Types - Types can be whatever you set them up to be. It is not essential that this functionality be used to get maximum account management benefit from the Debtor Master File, it just adds another layer to the details available about your client.
Description - Further explanation on the Account Information
Marketing Tab
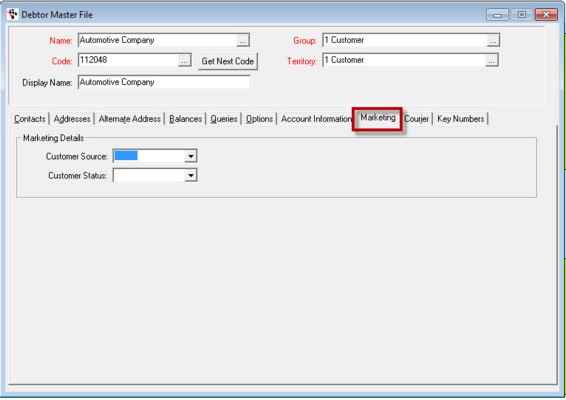
Marketing Details - Contains customer information specifically on customer source and status
Courier Tab - holds a database of couriers. To add couriers from the courier database to a debtor click on Name. The Courier Selection box appears, select the courier(s) required for this debtor by clicking on the courier name. Dollar values can be added if required. In the Parts invoice under the Despatch/Delivery By tab couriers can be selected for the invoice. More information on setting up Couriers can be found in Courier View.

Name - name of the courier
Amount - amount charged by the courier
Account - courier's account
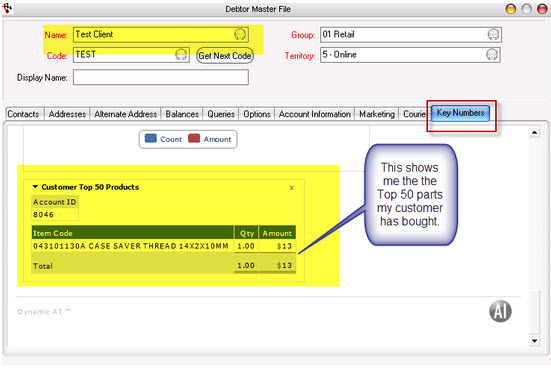
Key Numbers Tab
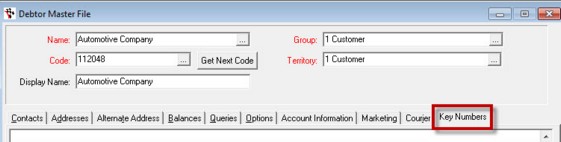
Top 50 Items bought by Selected Customer - You can now select a customer and see the top 50 items they have bought within seconds!! Previously you would have had to run a report, filter then export it to see this info
|
What are you trying to do? |
Video/Knowledge base Guide |
|
How to Set a Credit Limit on a Debtor Account |
http://service.autosoft.com.au/entries/21549340-How-to-Set-a-Credit-Limit-on-a-Debtor-Account |
|
How to Delete or Make a Debtor Account Inactive |
http://service.autosoft.com.au/entries/21377704-How-to-Delete-or-Make-a-Debtor-Account-Inactive- |
|
How to Bring Up Inactive Debtors |
http://service.autosoft.com.au/entries/21635790-How-to-Bring-Up-Inactive-Debtors- |
|
How to Make More Account Groups for Your Debtor Master File |
|
|
How to Add More Account Territories for you Debtor Master File |
|
|
How to Use Alternate Address in Autosoft |
http://service.autosoft.com.au/entries/21549234-How-to-Use-Alternate-Address-in-Autosoft |
|
How to Create a New or make an existing Customer a Debtor Account |
|
|
Watch Videos about Debtor Accounts, Setup and Maintenance |
Go to your Client Portal Login - Training Lessons - Accounting Series |